Thankfully, you can get help from other tools to import a table and place it inside the email text body in Gmail. In this article, I will explain step by step two easy methods of inserting a table in your Gmail emails.
Method 1: Copy and paste the table from another app
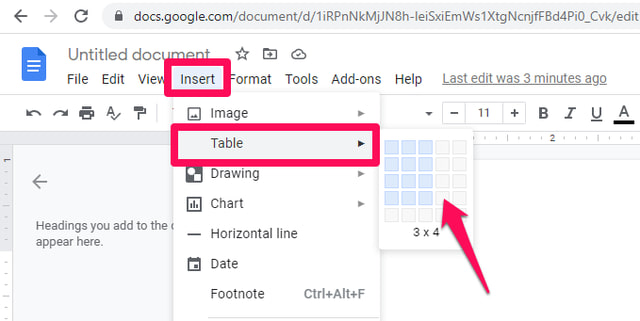
If you want to insert a table directly into your email in Gmail, first you need to draw the required table in any word processor (Google Doc, MS Word) or Spread Sheet (Google Sheets, MS Excel) of your choice. For demonstration purposes, I am going to use Google Docs. Step 1: In Google Docs, click on the “Insert” menu, then point the cursor to the “Table” option in the dropdown menu and select the table size you want to insert.
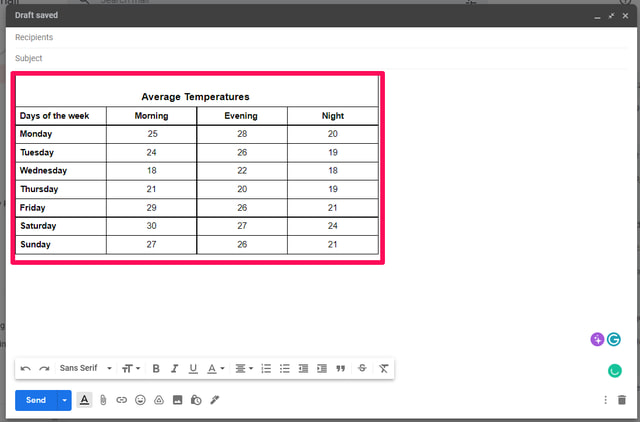
Step 2: Fill the table with the required data, and provide column and row headings. You must make the table as complete as possible as after pasting the table in Gmail editing options are limited. Gmail will allow you to change the table entries but not the structure of the table. Step 3: When you are satisfied with your table, select the whole table, right-click on it, and select “Copy” from the dropdown menu, or press Ctrl+C.
Step 4: Now got to Gmail and “Compose” a new email. Place the cursor where you want to insert the required table and paste the table by right-clicking and selecting paste or pressing Ctrl+V. The table will be inserted at the required location.
Method 2: Use a Google Chrome extension
If you use a table in your email text with Gmail regularly then it might be more convenient to have a specialized tool for it than to use the copy and paste work around all the time. One such specialized tool is the Gmail Tables by cloudHQ available as a Google Chrome extension. Just install the Chrome extension and follow the below steps. Step 1: Go to Gmail and click on “Compose”. Place the cursor where you want to insert the table and click on the new three dots button near the Send button. In the popup menu click on Table.
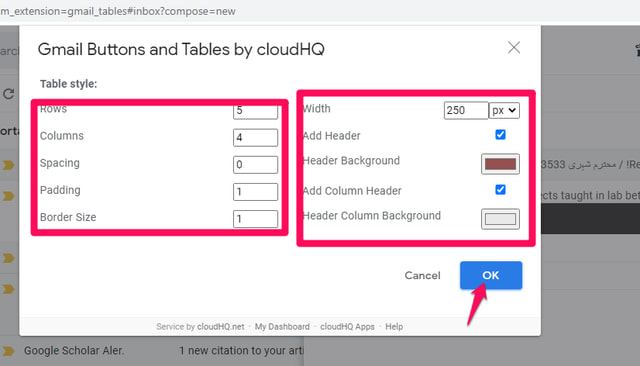
Step 2: Next you need to specify the size of the table, the number of rows and columns, add headers and their background colors, etc. Once you have made these choices, click on the “OK” button.
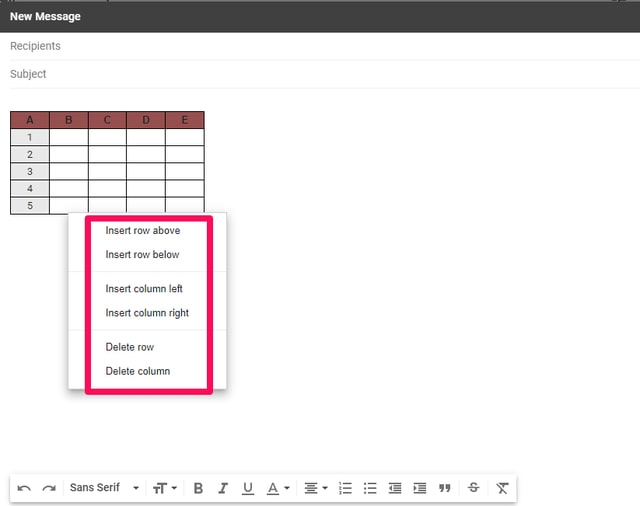
Step 3: Once the table is inserted you can start typing in the entries. You may add or delete columns and rows as per your need.
Wrapping up
Gmail does not support inserting tables directly into your email text. As a workaround, you can either prepare the table outside of Gmail and paste it into your email, or install and use a specialized Google Chrome extension for this purpose. If you use tables frequently inside your emails then using the Google Chrome extension might be a better idea as it is more convenient, flexible, and more powerful.